The Poor Man's Studio Set Up
I’m a hobbyist photographer and as such can’t afford to
dole out hundreds of dollars on studio equipment that I will only use
occasionally. This is when photography
becomes an adventure in your own home. I hope to show you how to create studio
stock photography with minimal photographic equipment and items that you either
have or can get reasonably. The scope of this post will cover the set up, as
well as touch on the camera settings necessary to get a good shot.
What
you will need
·
A frame that uses two panes of glass instead of
a cardboard backing
·
A lone pane of glass at least an 8”x10”
·
Parchment paper
·
Bookends
·
Anti-slip material
·
Laptop
·
Large hardbound book, no more than 1.5” thick
·
Card stock, color of your choice, though I
prefer white
o You
can use multiple sheets of plain white paper, it just needs to be opaque
·
A small object to photograph
·
Camera
·
Tripod
·
A flash that can be fired remotely
·
Automatic shutter release. This is optional,
though it makes life easier.

The
Set Up
The
Diffuser
·
Begin by cutting two pieces of parchment paper
that will fit in the frame between two panes of glass (pretend you’re framing
the parchment paper). This will be your light diffuser.
·
Lay down the anti-slip material and place the
bookends on either side with the framed parchment paper. See photo below.
·
Place Flash behind the diffusion and set it as “remote”
or “slave”.
o Due
to the numerous brands and models of flashes, we won’t cover how to change this
setting. If you are not sure how, a
quick search of the Internet will be your best bet for learning.
o Take
a test shot. See photos below.


The
Backlight and Platform
·
Open up your laptop and place it next to your
diffuser.
·
Bring up a white image in full screen mode.
o I
would also recommend turning the ‘auto off’ for your screen to ‘never’ so that
you don’t lose your screen mid-shoot.
·
Place the hardbound book on top of the keyboard,
the card stock or plain paper on top of that, and finally the lone piece of
glass.
o The
glass will give the photo a nice studio look.


The
Camera
·
The position of the camera is going to be a
matter of preference. This is a portion of the adventure that you continually
adjust in order to get different perspectives. I prefer to have the camera straight on and slightly higher than the object. See image below.

·
The camera/flash settings for this shot may take
a little bit of research on your part. My Nikon equipment allows me to remotely
fire flashes using on the on camera flash. If you have a different camera this
may require a little more equipment/research. If you use Nikon here are a few links to get you going: Nikon Speedlight PDF YouTube Video instruction
·
If you have all the necessary equipment than
there are really only a few choices. Do you want a white background, gray background or a black
background?
o In Manual Mode: Slow
shutter speed (1 sec, F20) will get you white, fast shutter speed (1/60 sec, F22) will get you a
black one and gray is somewhere in the middle (it's an adventure, remember, go and find it!). See images below.
 |
| Shutter: 1sec Aperture: F22 |
 |
| Shutter: 1/40 sec Aperture: F13 |
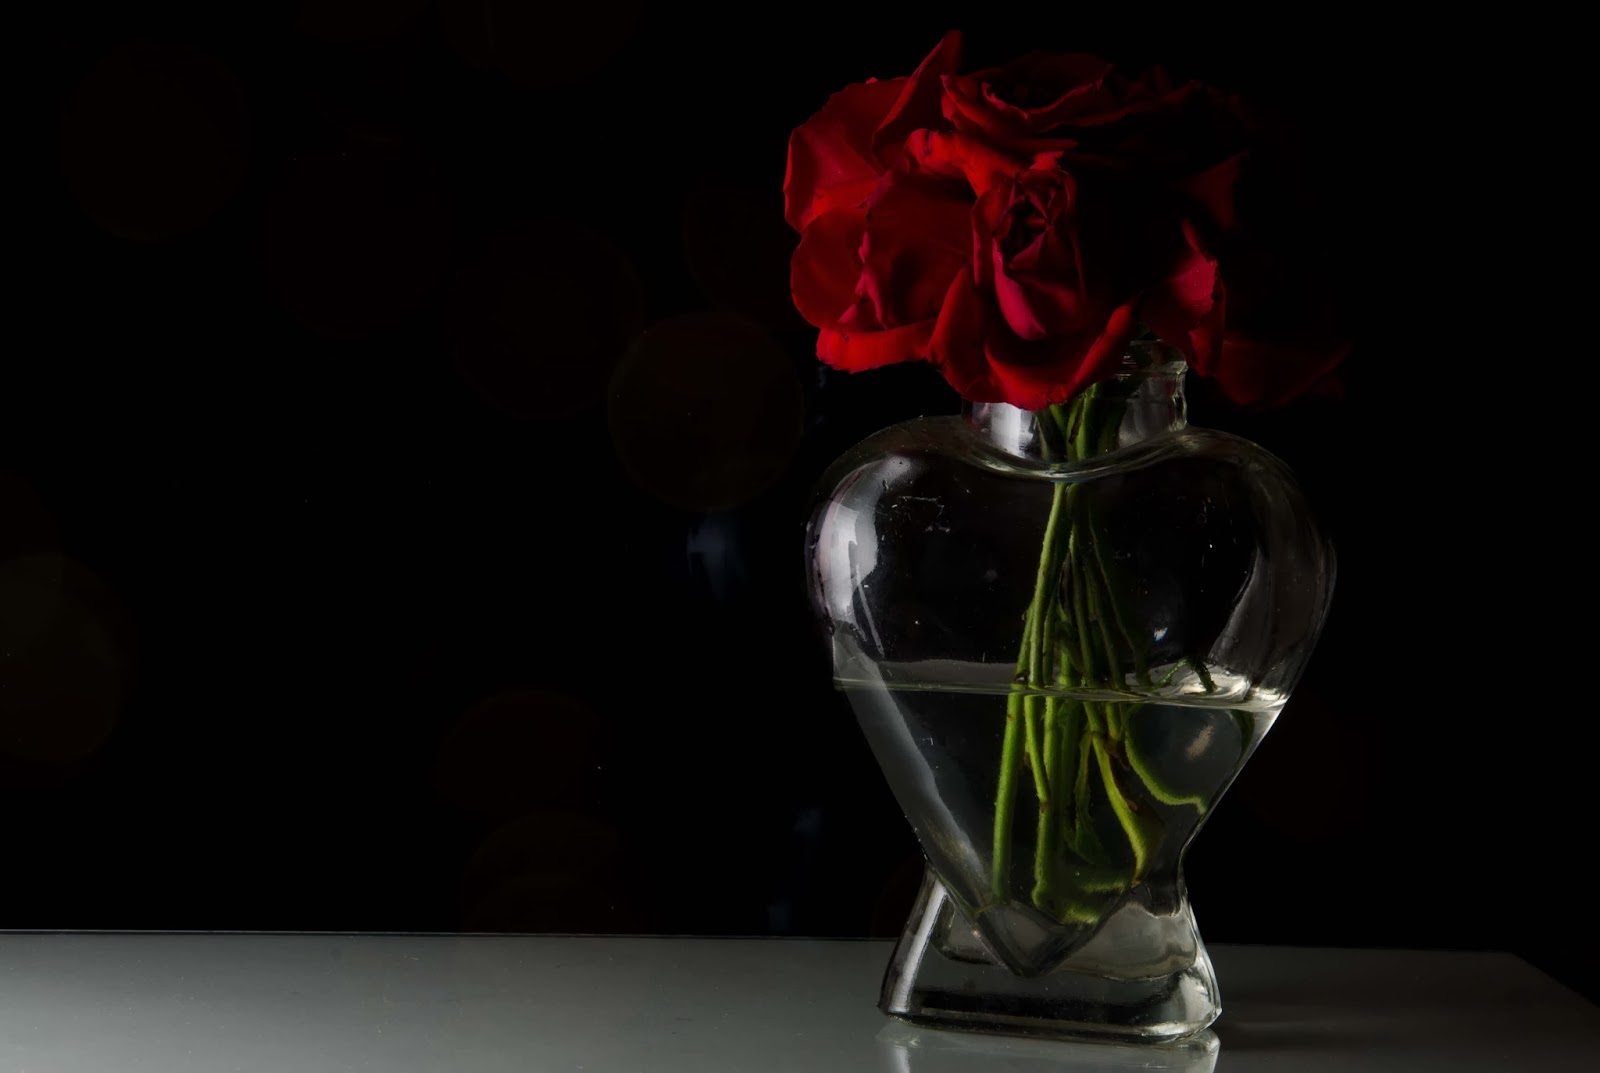 |
| Shutter: 1/60 sec Aperture: F22 |
·
If you don’t have an automatic shutter it may be difficult to get a clear shot with a slow shutter speed, drop the aperture (i.e. F4) and make the
shutter a little faster (i.e. 1/40 sec) and this should help.
·
Bonus: Load up a different backdrop! There are
many “out of focus lights” images on the web (Google is your friend here!). Just grab one and make it your backdrop
on the laptop. You will have to use the slower shutter speed for the camera’s
sensor to pick up the light from the laptop.

·
This is my first tutorial so it’s a little
rough around the edges; if you have any questions/critiques/comments feel free to contact me.


Dude! This is great stuff! I've never thought of using a monitor for a backdrop, but it's a slick idea! Keep 'em coming.
ReplyDelete